Certainly! Here’s a structured guide on integrating the WhatsApp API using Twilio and Laravel 11:
Laravel WhatsApp API Integration with Twilio
This guide will walk you through setting up WhatsApp messaging in a Laravel application using the Twilio API.
Step 1: Install Laravel 11
Before integrating Twilio, make sure you have Laravel 11 installed. If you don’t have it installed, you can create a new Laravel project using the following Composer command:
composer create-project --prefer-dist laravel/laravel exampleAppStep 2: Set up a Twilio Account
To send messages via WhatsApp, you’ll need a Twilio account. Register at Twilio’s website and set up a Twilio phone number capable of sending WhatsApp messages. Note down the Account SID, Auth Token, and the Twilio WhatsApp number for later use.
Step 3: Install twilio/sdk Package
Install the Twilio SDK in your Laravel project to interact with the Twilio API:
composer require twilio/sdkStep 4: Create Route
Set up the routes to handle the display of the message form and the submission:
// routes/web.php

use App\Http\Controllers\WhatsAppController;

Route::get('whatsapp', [WhatsAppController::class, 'index']);
Route::post('whatsapp', [WhatsAppController::class, 'store'])->name('whatsapp.post');
Step 5: Create Controller
Create a controller called WhatsAppController to manage the sending of WhatsApp messages:
// app/Http/Controllers/WhatsAppController.php

namespace App\Http\Controllers;

use Illuminate\Http\Request;
use Twilio\Rest\Client;

class WhatsAppController extends Controller
{
    public function index()
    {
        return view('whatsapp');
    }

    public function store(Request $request)
    {
        $twilio = new Client(env('TWILIO_SID'), env('TWILIO_AUTH_TOKEN'));
        $to = 'whatsapp:' . $request->phone;
        $from = 'whatsapp:' . env('TWILIO_WHATSAPP_NUMBER');
        $body = $request->message;

        $twilio->messages->create($to, [
            'from' => $from,
            'body' => $body
        ]);

        return back()->with('success', 'WhatsApp message sent successfully!');
    }
}
Step 6: Create Blade File
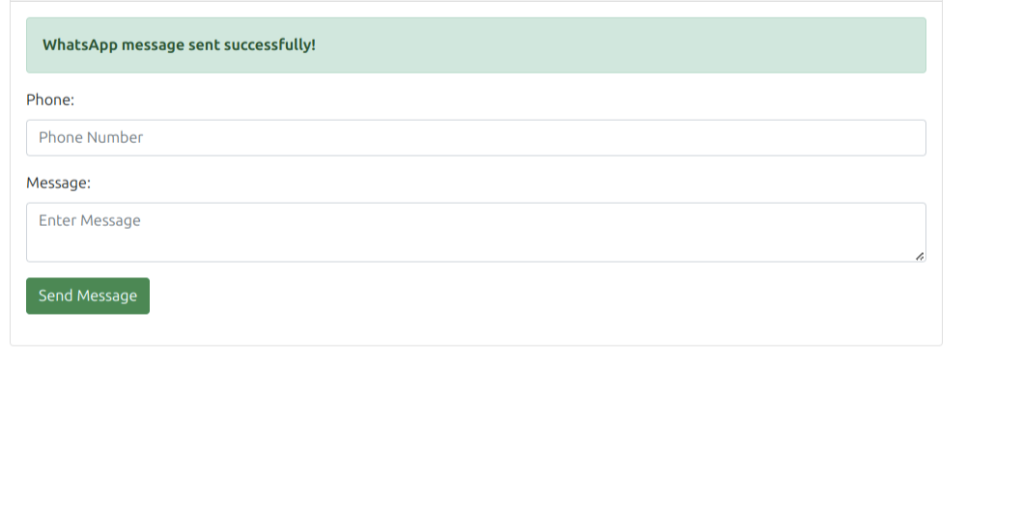
Design a Blade file for the user interface where users can enter their phone number and message:
<!-- resources/views/whatsapp.blade.php -->

@extends('layouts.app')

@section('content')
<div class="container">
    <h1>Send WhatsApp Message</h1>
    <form method="POST" action="{{ route('whatsapp.post') }}">
        @csrf
        <div class="mb-3">
            <label for="phone" class="form-label">Phone Number:</label>
            <input type="text" class="form-control" name="phone" id="phone" required>
        </div>
        <div class="mb-3">
            <label for="message" class="form-label">Message:</label>
            <textarea class="form-control" name="message" id="message" required></textarea>
        </div>
        <button type="submit" class="btn btn-primary">Send Message</button>
    </form>
</div>
@endsection
Run Laravel App
Start the Laravel application to see the WhatsApp messaging in action:
php artisan serveVisit http://localhost:8000/whatsapp to test sending a WhatsApp message.

By following these steps, you will have integrated WhatsApp messaging in your Laravel application using Twilio, allowing you to engage with users directly through WhatsApp.


Thanks for sharing